You can have a premium epoxy picked out, a clean color in mind, even a non-slip finish specified – and still end up with a floor that telegraphs every patch, ridge, and grind mark if the concrete isn’t truly flat. That’s where skim coating comes in. A skim coat is not a “nice-to-have” add-on. In a lot of garages, shops, and warehouses, it’s the difference between a coating that looks sharp and lasts, and one that shows defects and wears in all the wrong places.
This article breaks down what a skim coat concrete floor leveling compound does, when it makes sense, and what has to happen before and after it goes down so your final surface performs.
What skim coating really does (and what it doesn’t)
A skim coat concrete floor leveling compound is a cementitious (or polymer-modified) material spread in a thin layer to fill minor surface defects and create a smoother, more uniform substrate. Think of it as the “surface correction” step – used after structural issues are handled and before the final flooring system is installed.
It’s important to be clear about the limits. Skim coating is designed for small irregularities: shallow spalls, pitting, light crazing, trowel marks, and transitions between repaired areas and the surrounding slab. It can also help even out the texture after grinding so the coating system sits on a consistent profile.
What it won’t do is fix a slab that’s heaving, moving, badly cracked, or significantly out of level from one side of the room to the other. If water is coming through the slab, if there’s ongoing moisture vapor pressure, or if the concrete is contaminated with oils that have soaked deep – those are separate problems that need proper diagnosis and prep.
When a skim coat concrete floor leveling compound is the right call
The most common reason to skim coat is visual and performance consistency under coatings like epoxy. Epoxy reflects light. That’s a feature – it looks clean and bright – but it also means imperfections show.
Skim coating is typically worth considering when the slab has widespread shallow pitting, lots of small patches from old fix-ups, or heavy grinder swirls that would print through a high-build coating. It’s also useful when you’re changing the floor’s function. A warehouse aisle that needs clear line marking, a commercial kitchen that needs reliable cleanability, or a retail space where presentation matters can benefit from a smoother, more uniform base.
It can also be a safety decision. Localized dips and rough transitions can create trip points, make it harder to squeegee liquids, and cause forklifts or pallet jacks to “chatter” over repaired edges. A skim coat helps reduce those small but persistent operational issues.
There’s a trade-off: skim coating adds a step, and that step only performs if it’s bonded to correctly prepared concrete. Rushing prep to save time usually costs more later.
Skim coat vs self-leveling compound: don’t confuse the two
People often ask for “leveling compound” when what they really want is a flatter-looking floor. A skim coat and a self-leveling underlayment can both improve flatness, but they’re not interchangeable.
A skim coat is applied thin. It’s meant to refine the surface and fill minor defects, not to flow out and correct major elevation changes. A self-leveling product is designed to be poured thicker so it can move and settle, reducing larger variations across the slab.
If your garage has a few low spots that hold water, or a commercial tenancy has an old slab that’s generally wavy, you may need localized leveling, a self-leveling pour in sections, or a more involved grind-and-fill approach. The right choice depends on how far out the slab is, what the final system is (epoxy, flake, polyurethane, spray-on coating), and how the space is used.
The step that decides everything: surface preparation
Skim coat failures usually aren’t because the product is “bad.” They’re because the substrate wasn’t prepared to accept it.
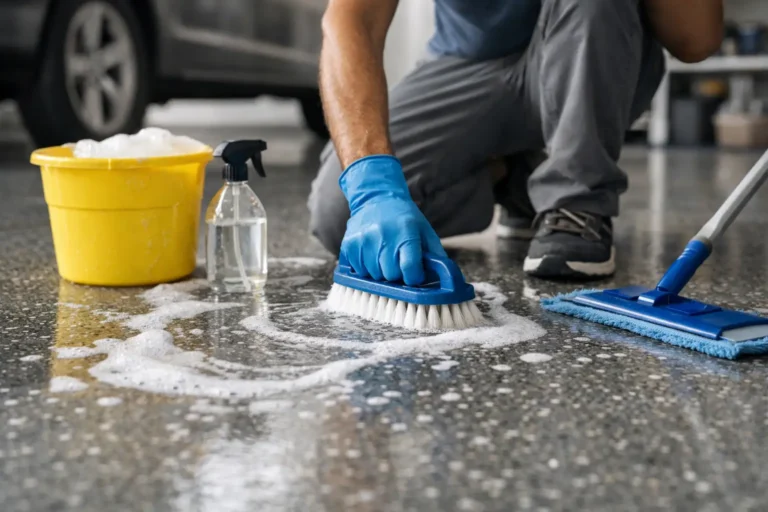
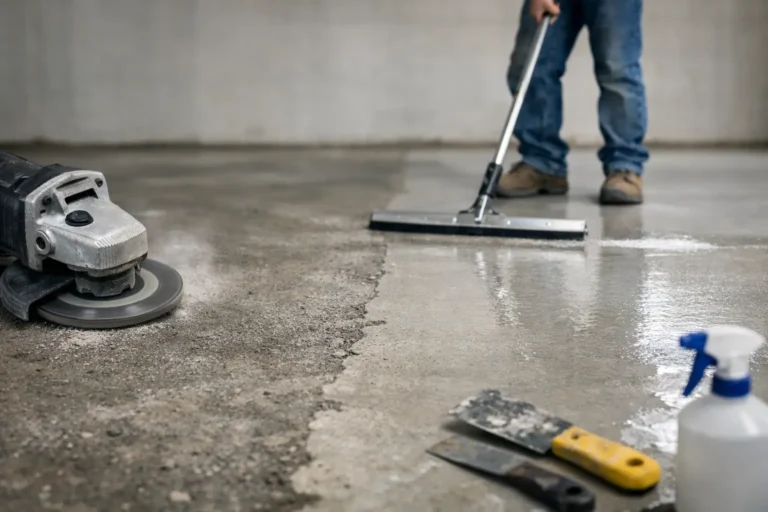
Concrete needs to be mechanically profiled so the skim coat can bond – that typically means grinding with the right tooling for the slab condition. If there’s curing compound, paint, old adhesive, or contamination, it must be removed. Dust control matters here because residual dust acts like a bond breaker. If you can wipe your hand across the slab and pick up a fine film, you’re not ready.
Cracks and joints also need a plan. Random cracks may need routing and filling depending on movement risk and the coating system. Control joints generally remain as joints (because they’re there for a reason), but they can be treated differently depending on whether you want them honored through the coating or minimized for cleanability. Skim coating over moving joints without detailing is a common way to create reflective cracking later.
Moisture is another big variable. Concrete can look dry and still have moisture vapor transmission that interferes with bonding and coating performance. If the floor is in a space that’s been closed up, recently washed down, or subject to ground moisture, you want to address that before committing to a skim coat and epoxy build.
How skim coating is applied on real job sites
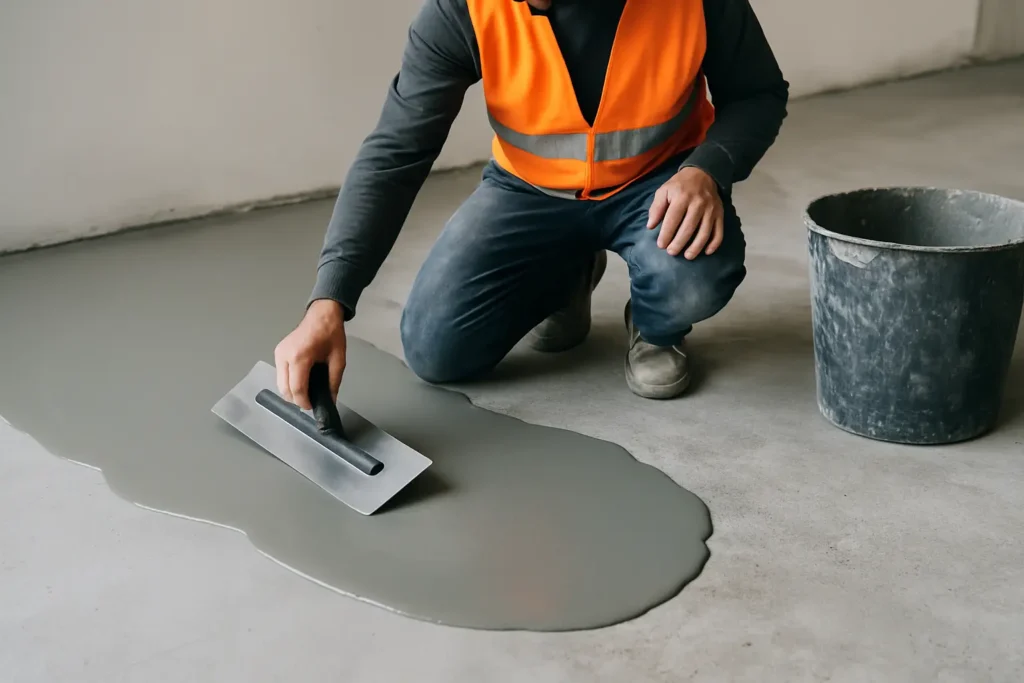
A good skim coat is controlled, not improvised. The compound is mixed to the manufacturer’s ratio, then applied in thin passes using trowels or squeegees depending on the product and the finish target.
The goal is to fill defects and create a uniform surface without leaving heavy ridges that need aggressive grinding later. Many floors require two passes: the first to fill and stabilize the surface, the second to refine it after the first has cured.
Cure time matters. If you coat too soon, you can trap moisture or compromise adhesion. If you wait too long without proper re-prep, you may need to abrade again to ensure bond for the coating system. Timing depends on product chemistry, temperature, and slab conditions.
After the skim coat cures, the floor is typically lightly re-ground or sanded to remove high spots and bring the surface to the right profile for primer and epoxy. This is where the “looks flat” standard becomes a measurable standard – a consistent surface that accepts primer evenly and doesn’t create dry spots.
What can go wrong (and how to avoid it)
Skim coating is straightforward when done correctly, but it’s not forgiving.
Debonding is the big one. It happens when prep is inadequate, when the slab is dusty or contaminated, or when moisture conditions aren’t compatible with the product system. Debonding can show up as hollow spots, drummy sounds, or sections that chip out under traffic.
Cracking and mapping can happen when the skim coat is applied too thick in areas that should have been built up with a different repair method, or when movement cracks and joints weren’t detailed properly.
Edge telegraphing is another common complaint – you can see the outline of patches through the final coating. That’s usually a finishing issue: the skim coat wasn’t feathered properly, or it wasn’t sanded flat before coatings went down.
Color variation can also surprise people. Most skim coats aren’t designed to be the finished look. If you’re applying a clear sealer or a very thin coating, the underlying color shifts may show. Under a properly built epoxy system, that’s typically not an issue.
How skim coating fits into an epoxy flooring system
For epoxy to perform, it needs two things: a sound substrate and the right profile for mechanical bonding. Skim coating can support both – but it must be compatible with the coating build.
Most high-performance epoxy systems start with a primer that wets out the substrate and locks in bond. If the surface is too rough, primer consumption can spike and leave you with dry areas. If the surface is too smooth or dusty, adhesion drops. A well-executed skim coat, followed by the correct re-profile, creates a consistent base so primer spreads evenly and the epoxy build stays uniform.
If you’re choosing non-slip textures for safety, a smooth base matters even more. Anti-slip aggregates need an even coating thickness to stay consistent underfoot. A floor that’s wavy or heavily pitted can end up with “hot spots” where texture is aggressive in some areas and weak in others.
Is skim coating worth it for your floor?
It depends on what you expect the finished floor to do.
If you just want a basic seal on a low-use storage area, skim coating may be unnecessary. But if the space is a garage you want to keep clean, a workshop that sees rolling toolboxes, a shopfront where presentation matters, or a warehouse aisle that can’t afford patch failures, skim coating is often a smart spend. You’re paying for surface uniformity, better coating consistency, and fewer weak points that wear early.
The other “it depends” factor is slab condition. If your concrete needs deeper repairs, moisture mitigation, or significant leveling, a skim coat alone won’t solve it. The best outcomes come from specifying the full prep and repair sequence, then building the coating system on top of that foundation.
If you want a floor that looks clean, wears evenly, and stays safe under traffic, treat skim coating as part of the performance plan – not a cosmetic quick fix. When Floor Masters prices epoxy projects, we look at the concrete first and quote the prep honestly, because the longest-wearing finish starts with the slab you can’t see once the coating is down. You can get a fast quote at https://Floormasters.com.au.
A good skim coat doesn’t call attention to itself. That’s the point. It quietly removes the small defects that turn into big annoyances later – and it sets the stage for a floor that feels as solid as it looks.